Overview of Nuke
This week an overview of Nuke where introduced, the basics of the viewer window, time line including in and out points, the projects settings information’s in the viewer (Bottom), Gama and Gain control de exposure of the image (top viewer). Also, showing the Node Graphs and adding more nodes to the project.
Setting project directory
Each section, the projects will be at the desktop. A folder called Nuke_Overview where downloaded from blackboard to the desktop.
Now with my Nuke 13.0v1 open and before bring any Nuke Comp script, Press S in the Keyboard to set up the project settings. Pressing the `Script Directory` folder in project settings box and search to Nuke_Overview folder saved to the desktop and press open not going in to any of the folders. With the project directory set which is very similar to Maya, to have it all in specific folders, to be a where when to move files around, and then, go to Files, Insert Comp Nodes, navigates to the Nuke_Overview folder saved to the desktop once again, click in the nuke_scripts, and choose the folder, and click open.
To view the image on the viewer window click and press 1 in the keyboard.
Rodrigo Rodrigues
Week 1 - Introduction to 3D Animation, the bouncing ball
With Mr. Lee Montgomery MA, BA (Hons), FHEA, PgCert
Course Leader; BA (Hons) Games, Design and Animation
The Week 1, Mr Montgomery introduced Maya animation controls (Range Slider, Cached Playback status line and the Playback options). Also, an over all look in Set Keys, shortcut on keyboard (S), set animation on selected object or attribute.
In the Key attributes (channel box), was shown in how to select the keys and change the attributes value in each and over all.
The graph editor navigation also was part of the lecture of this week, the graph editor allows to control animation in a precise and visual way, giving an extra control on the top of the animation work.
`Maya's Graph Editor is an updated version of the legacy Maya Graph Editor, giving a more intuitive approach to manipulating animation curves and keys in our scene. Its possible to view and manipulate curves in various ways.


The exercise was firstly a try to understand the functions of the animation learned in the class today, then I used the basics of the animation in how to set the key and change the attributes in the channel box, scaling and rotating.
Following the exercise, at the ending result of the bouncing ball, was added some camera and edited all together, (Total of 4 cameras) to see how it would work.
The final work below...


Based in the lesson from today, my exercise was inspired in the references presented by Mr Lee.
I tried to consider the type of the ball used in the animation scene, and also the different ground contact and a second object in the scene, causing an extra interference as the ball touches it, in both objects.
The amount of air inside the bouncing ball, was also a consideration in how it would stop at the end of the movement in the scene.
I also understand that, this first try contain some mistakes in the rules of animation and how it should works better in my next go (sorry for the English).
Week 2: The Obstacle course
With Mr. Lee Montgomery MA, BA (Hons), FHEA, PgCert
Course Leader; BA (Hons) Games, Design and Animation
Recap
The Week 2, Mr Montgomery started the class recapping on Animation controls, Set Keys, Auto Key,
Set Key in the Channel Box, Time Slider, Selecting and editing Key Timing, Dopesheet and Edditeble Motion Trail used on my first bounce ball exercise on week 1. (Character Animation - Week 02_AY2021.pdf)


Control Rigs and Animation interfaces
`In week 2, (Character Animation - Week 02_AY2021.pdf), covered also the the coloured NURBES curves, the control objects that provides visual interface for animation. `Rigs provide simplified controls or abstraction for animators.`
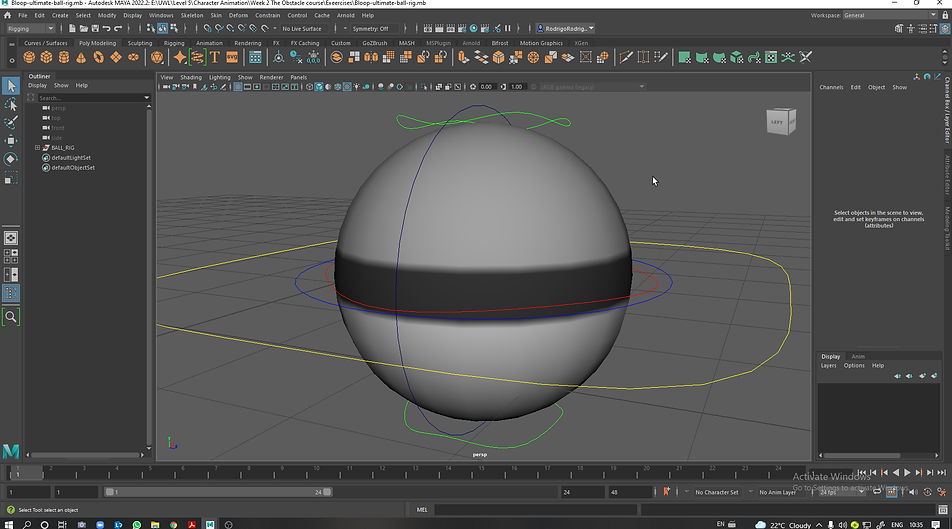
Ball – Control Rig – Overall Placement (relocation)
Main Yellow Curved control (ball_placement_ctrl). Overall placement and to relocate animation. Used to reposition animation but not to animate.
Ball – Control Rig – Move Control
(Blue ball_move_ctrl) To animate the position of the ball and or object. Moves in set up and the hierarchy

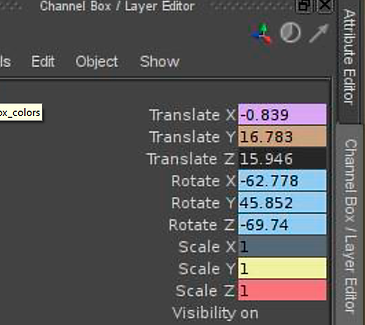
Ball – Control Rig – Channel Box Inputs
Channel Box colors - The state of channels is represented by the colors below...
Gray Locked
Light Gray Nonkeyable
Brown Muted
Green Blended
Red Keyed On Frame
Dark Pink Keyed Of Frame
Light Pink Key Altered
Purple Expression
Blue Constrained
Yellow Connected
Following the (Character Animation - Week 02_AY2021.pdf) week 2 lecture.
With Mr. Lee Montgomery (fantastic for my learning process).
Screenshot left `You will notice that a few of the Control Objects for our ball havechannels that are greyed out or coloured in the Channel Box. Colour indicates state of channel. i.e. channel is locked or accepting incoming connection such as constraint` Lees PDF
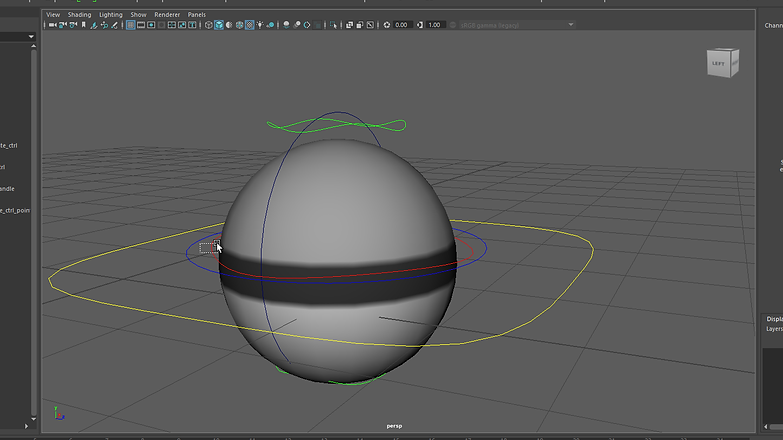

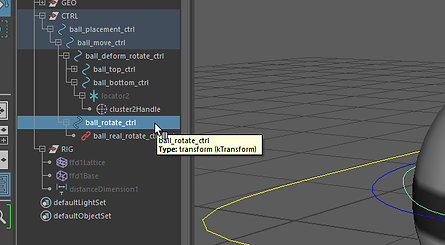
Ball – Control Rig – Squash n Stretch Control
To Squash and Stretch in the rig select the Bottom Green (ball_top_ctrl) and (ball_bottom_ctrl), using the Translate tool with local translation to deform.
Ball – Control Rig – Squash n Stretch rotate Control
`The dark blue coloured ball_deform_rotate_ctrl control allows us to rotate our deform controls to offset our squash and stretch. To use this, rotate ball_deform_rotate_ctrl then set the Translate tool to Object mode then translate either ball_top_ctrl or ball_bottom_ctrl` Lees PDF TEXT.
Ball – The Obstacle course
Following the lessons, I made a very basic animation with a bouncing ball using one obstacle (Left video), and then taking my learning forward, I worked on a next obstacle course, but unforgettably, after update the older version of Maya to the 2022 version, the saving settings was not applied and then a lost it all after few hours working. At list, i saved some screen shots. I deftly will make an other one.


Week 3: Lattice deformer, ‘Sack of flour’ and Arm Rig
With Mr. Lee Montgomery MA, BA (Hons), FHEA, PgCert
Course Leader; BA (Hons) Games, Design and Animation
And Nick Savy
Arm Rig exercises

Press V to the magnetic

Hierarchy, meddle mouse clicking and dragging, parenting the objects making them children.
1controD Duplicate


Selected all 3 cubes, modify ... but no changed much on my , imissed some thing.

4 Duplicated all the fingers using the outliner ctrl D

5 Rename all in the Outliner then modify and then freeze transformation again to make sure it[s all right
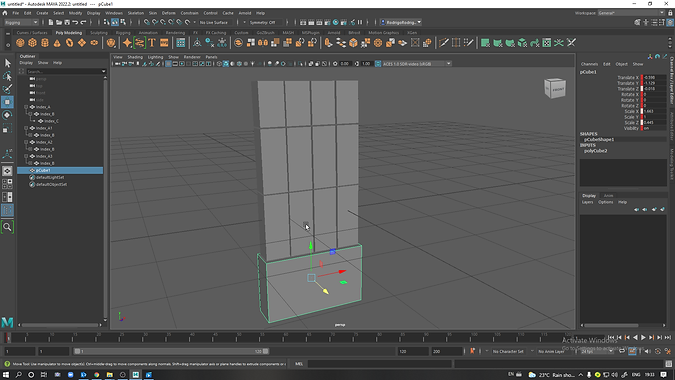
6 in the Outliner Ctrl D to duplicate all the fingers and bring a other Cube under the index fingers, transforming

7 full hand done

8 Selecting all in outliner- -modify-freeze transformation and then apply. Looking at the Channel box all goes to 0 and 111

9 Click meddle mouse and drag L_hand to L_forearm, very important to follow this step.

10 Close all indexes and Click and drag all of them to L_hand


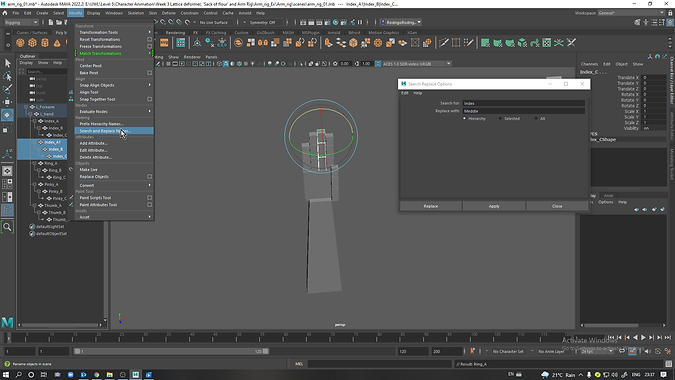
13 change the names in Modify Search and replace names, search for the names Index to change the names of the fingers as it shows the screenshot
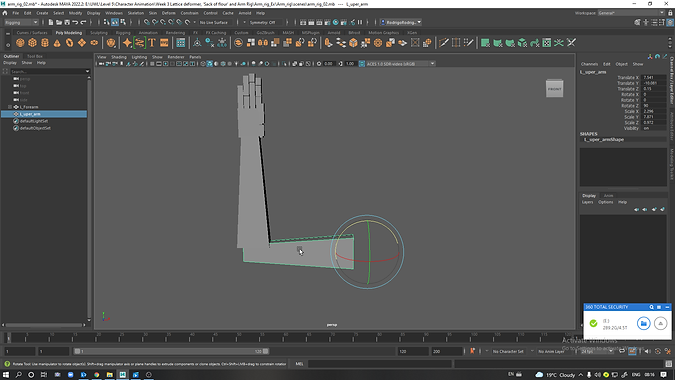
14 duplicate entire arm, delete L_hand, Key board E then J to rotate 90 degrees Snap Rotation in Outliner rename as L_upper_arm`

15 Make sure everything is 0 down go to Modify then frees freeze Transformations, when doing rigging to reset again to move to anyother places.

16 Meddle mouse Click the L_Forearm into the L_Upper_arm

17 L_forearm is a child of L_upper_arm
18 Moving it

19 File-Increment and save. Constantly or CTRL+S

20 Bringing a Polygon Primitive, scaling it and then connecting all the parts, rename it as Chest.
21 Rename all Hierarchy. selecting in the outliner then Modify and click on Prefix Hierararchy Names and last adding the desired name+underscore
22 Moving the Thumb Hierarchy up.
23 Replacing the all L for R in the Hierarchy, selecting it on the outliner, go modify, search and Replace Names as it shows the video.

24 Important to name objects using the Capital letters and small letters following the ex R_meddle_A R_meddle_B R_meddle_C
25 Group before duplicate the second arm. Selecting L_upper_arm then Ctrl G, Rename us R_arm and then move it above Chest in the outliner .
26 In the Outliner select R_arm, Edit, Duplicate Especial, Duplicate. Specials Options Box Edit , Reset Settings, Scale -10000, apply
Moving upper body
Organizing the Hierarchy R_arm, L_arm and Head to chest and then chest to abdomen
Week 4: Inverse Kinematics | Animation Output
With Mr. Lee Montgomery MA, BA (Hons), FHEA, PgCert
Course Leader; BA (Hons) Games, Design and Animation
And Nick Savy
Continuing character Rig
Week 5 uploading soon...
Assignment 1: Basic Weight Mechanics
Final 1
Final 2
Some tests was performed to recreate the movements. Notes of the process down below.
To start this assignment some tests was performed.
Some extras investigations


Assignment 1 notes
First, was added some objects, to create an environment to perform the animation


Used the FrontView, Perspective and Graph Editor.

Seted the timeSlider in preferences to 24fps
Visualize , Create editable motion trail

Front view to set up and down keyframes

Shift +LMC +Select and Drag to move time editorkeyframes.

To Reverse Animation, select the obeject and then ...

...go to Key, and then click on Bake Simulation... All key frames to work with apears


...In the Graphy Editor, Select the KeyFrames disired to reverse...

... And then, copy and past where the reversion movement where supposed to be...

...With the moving tool selected, ...Click and drag, reversing the Keyframes at the GraphyEditor, Just above the Keyframes


Before reverse... After Reverse
Coping and pasting the key frames

Copied the MiniCart KeyFrames (TranslateX)...
%20.png)
...To the Sphare Translate X. Matting the Movement Keyframe Starting point...

...The ball and MiniCart moved at the same speed, and then, just fixed the Ball extra movements inside the MiniCart.

Added Camera 1, and then, changed the Aspect Ratio to HD 1920x1080...

...Camera 1 Focal Lenth of 35mm and Film Gate to 35mm 1.85Projection...

Adjusting speed - Camera 1 and 2.

Making Multiples Cameras Renderable, AtributeEditor, CameraShape1,OutputSettings and tic Renderable, and repeat the same process to all cameras

...Next to RenderSettings, FileOutput, and in Metadata (name,Type,value) shoose (name_#.ext) in the FrameAnimation ext
%20shoose%20(name_%23_ex.png)
...In RenderSettings, click on ArnoldRenderer, Sampling and then, incrise the resolution of the work Changing the num,ber 3 for 4 in Camera(AA)... But to render faster, my final project was seted in 3.

Week 6: Walk
With Jay-Won Shin
Walk Cycle Animation - Layering Approaching
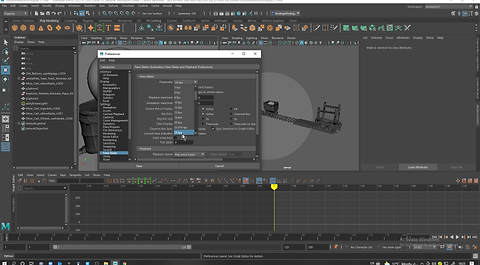
%2024fps_%20Tick%20AutoSn.png)
0. Begun with Frame Rate and Playback Rate, in TimeSlider Framerate to (film rate) 24fps. Tick AutoSnapKeys box and then PlaybackSpeed 24fpsx1 matting the Time Slider Framerate .png


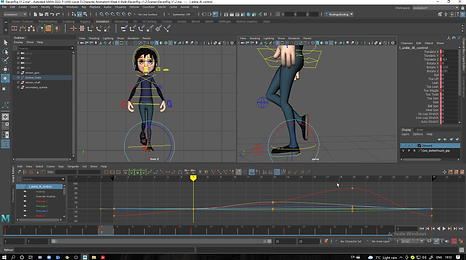
1. Using the Layering Approuch It starts with Hips and Feat. Contact Poses, Walk Cycle Animation 2 steps in 1 sec = 24fps (Frame 1 and 25 with the same pose) to be looped again and again.

3. At Frame 13 was mirrored to opposite legs from frames 1 and 25 .


4. Passing Position to frame 7 and 19 mirroring each other.

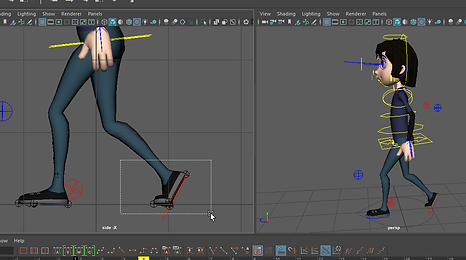
5. Down Pose (down extreme of the walk) Frame 4, Bending characters legs, Hips to rotation to the front, Front feet flat, and then and copy the frame 1 back feet atributes to frame 4. and an extra toe wiggle in the back feet to shows the character impulse budy pressure as the last point contact with the ground before lift it of pn - Copy
6. And then coppied the frame 4 hips Rotate x and Translate y to Frame 16, repeat the same for the oposite feet

7. And then Frame 22 copiyng the rotation and translate atributs
8. Up Positon Frame 10 and 22 the extreme up positiong of the walk. straghting the character s leg, hips rotetion back

8.1. PS .In passing position was applyed 0.2 translate x 0n frame 7 and and 19 mirroring each one of it.

9. Upper Budy, Chest rotation oposing the legs of frame 1 and 25

10. and frame 13 the same atributes but negative


11. Passing Position to frame 7 and 19 balancing the walking rotating the characters chest.


12. Head - Frame 1 and 25 turning characters head slightly to oposing the front legs, mirroring these two frames


13 Head - Frame 13 the same mirrored numbers atrubutes
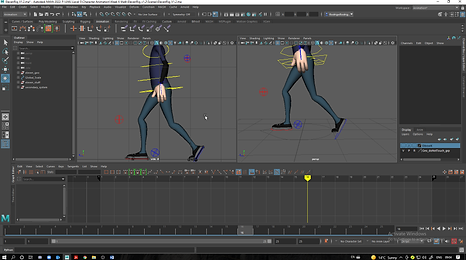
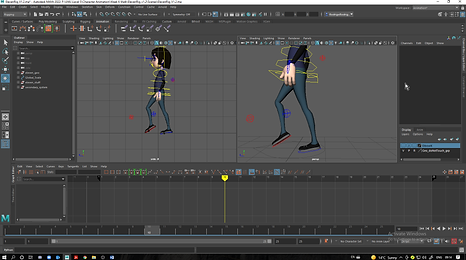
Assignment 2 - Walk_Cycle. The Limping Fela
Assignment 3 - 11 Sec Animation